- Google Protocol Buffer Gradle
- User Management GRPC service definition
- Create the Java GRPC server
- Build the Server
- Run the Java GRPC server
- References
In the last post, we established the database connection between our Java application and MySQL database server. Now we will create a GRPC server in Java that will help to create new users and also provide the login functionality based on the email address and password of the user. Let’s learn to create the GRPC Server in Java in our User Management Service application
- Part 1: What we are going to Build | User Management Service | Java | GRPC
- Part 2: MySQL Database | User Management Service | Java GRPC
- Part 3: GRPC Server Java | User Management Service
- Part 4: Create User in User Management Service GRPC Java
- Part 5: JWT token Java | User Management Service Java GRPC
- Part 6: Login API with JWT | User Management service Java GRPC
Google Protocol Buffer Gradle
If you want to read into details about Google Protocol Buffer support in Java then you can follow
Add Protobuf Gradle Plugin in Gradle file
You need to add the Protobuf Gradle Plugin which will help you generate the Java Classes from the Protocol buffer and then you can use those classes in your application
plugins {
    // Note there can be more things in you build.gradle file
    id "com.google.protobuf" version "0.9.4"
}
Once the plugin is added then you need to define the protobuf task inside build.gradle file
protobuf {
    protoc {
        artifact = "com.google.protobuf:protoc:3.21.1"
    }
    plugins {
        grpc {
            artifact = 'io.grpc:protoc-gen-grpc-java:1.62.2'
        }
    }
    generateProtoTasks {
        all()*.plugins {
            grpc {}
        }
    }
}
Let’s understand different section
protoc {
        artifact = "com.google.protobuf:protoc:3.21.1"
}
This tells Gradle how to find the Protobuf compiler. In our case, we are downloading it from the online repository. You can also download the compiler locally and then give the path information
plugins {
    grpc {
       artifact = 'io.grpc:protoc-gen-grpc-java:1.62.2'
    }
}
This tells Gradle which Java library will be used to generate the Java Classed from the .proto file
Add Java Dependencies to understand Generated Java Classes and create a GRPC server
When you generate the Java classes from .proto file then you need to add the libraries that help your project understand those files or classes.
We will be adding two dependencies
For creating the GRPC server we will add one more dependency
    testImplementation 'org.junit.jupiter:junit-jupiter:5.9.1'
    implementation 'javax.annotation:javax.annotation-api:1.3.2'

    implementation group: 'io.grpc', name: 'grpc-netty', version: '1.62.2'
    implementation group: 'io.grpc', name: 'grpc-protobuf', version: '1.62.2'
    implementation group: 'io.grpc', name: 'grpc-stub', version: '1.62.2'
User Management GRPC service definition
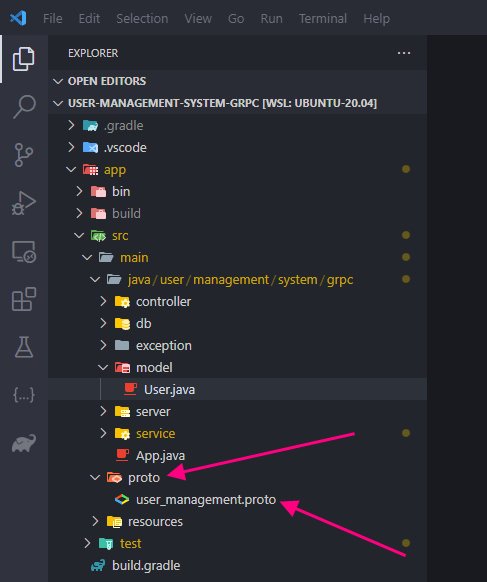
Create the folder proto and then add the file user_management.proto
The proto folder should be created in the same place where it is shown below because protobuf-gradle-plugin will pick the proto files from this place.
Define the message contract and service definitions inside the user_management.proto file
syntax = "proto3";
option java_multiple_files = true;
package com.cwrr.user_management;

message Error {
    string code = 1;
    string entity = 2;
    string message = 3;
}

message CreateUserRequest {
    string first_name = 1;
    string last_name = 2;
    string email= 3;
    string password = 4;
    string created_at = 5;
}

message CreateUserResponse {
    bool success = 1;
    Error error = 2;
    int32 user_id = 3;
}

message LoginRequest {
    string email = 1;
    string password = 2;
}

message LoginResponse {
    bool success = 1;
    Error error = 2;
    string jwt_token = 3;
}


service UserManagementService {
    rpc CreateUser(CreateUserRequest) returns (CreateUserResponse);
    rpc Login(LoginRequest) returns (LoginResponse);
}- Properties
- syntax = “proto3”
- proto3 syntax is being used for writing this Google Protobuf file
- option java_multiple_files = true;
- When Java class files are generated then separate files will be generated. It will be easy to read the class files if different files are generated
- package com.cwrr.user_management;
- All the class files will be generated under the com.cwrr.user_management package. If you want to use the classes then you need to refer to this package
- Here cwrr is the short form of code_with_raj_ranjan
- syntax = “proto3”
- Service Definition
- CreateUser
- Accept the CreateUserRequest message and return the CreateUserResponse response
- Login
- Accept LoginRequest message and return LoginResponse message
- CreateUser
- Message Definition
- Error
- When the Error is returned then it contains three fields code, entity, message
- You can define specific code for specific error types and it becomes easy to debug your code.
- Message can be more descriptive about the error like database failure, user not found or user already exists, etc.
- CreateUserRequest
- This is the message used in the CreateUser service. It contains all the important fields related to the user
- CreateUserResponse
- This message is returned when the user is created
- If user creation has some errors then success is populated as false and also Error object is populated
- If user creation is successful then success is populated as true with no errors. Also, user_id of the user is returned
- LoginRequest
- This is the request for Login service
- LoginResponse
- This is the response for the Login service
- Error
Generate Java Classes
You need to run the build command of gradle to generate the Java class
./gradle clean build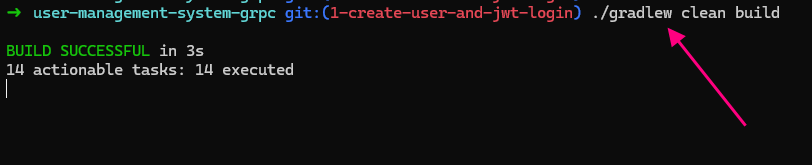
Once the build is successful then you will view the generated Java classes in the build folder. You can see that multiple Java files are created.

Create the Java GRPC server
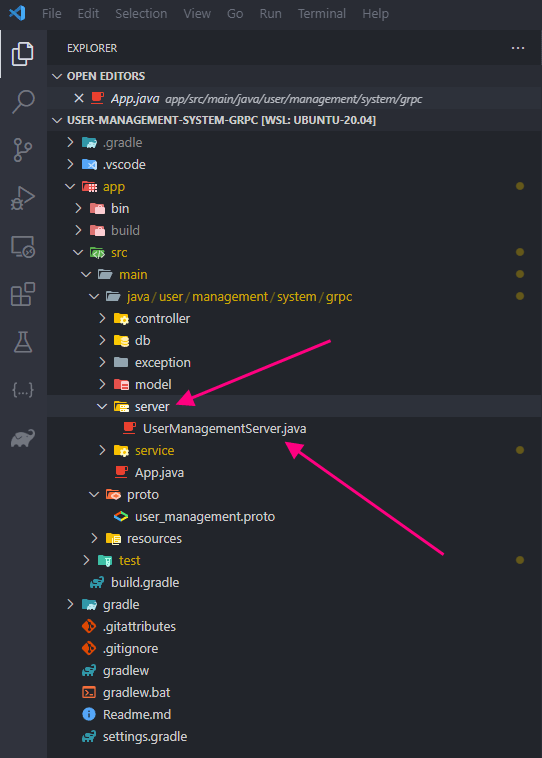
Create the server folder and add the UserManagementServer.java file
Define the server RPC
You need to extend the UserManagementServer class to UserManagementServiceImplBase class to create the GRPC server definitions.
package user.management.system.grpc.server;

import com.cwrr.user_management.UserManagementServiceGrpc.UserManagementServiceImplBase;


public class UserManagementServer extends UserManagementServiceImplBase{


    public UserManagementServer() {

    }

    @Override
    public void createUser(com.cwrr.user_management.CreateUserRequest createUserRequest, io.grpc.stub.StreamObserver<com.cwrr.user_management.CreateUserResponse> responseObserver) {


    }

    @Override
    public void login(com.cwrr.user_management.LoginRequest loginRequest, io.grpc.stub.StreamObserver<com.cwrr.user_management.LoginResponse> responseObserver) {


    }

}- UserManagementServer should extend UserManagementServiceImplBase class and then override the service definition methods
- UserManagementServiceImplBase is the Java Generated class from the Protocol Buffer file
- Public Methods
- UserManagementServer Constructor
- This is the constructor. Later on, we will use it to define the dependencies that will be used in the server
- createUser
- This is the first RPC method for creating the user. we will write the user creation code here
- login
- This is the second RPC method to provide the login functionality.
- UserManagementServer Constructor
Build the Server
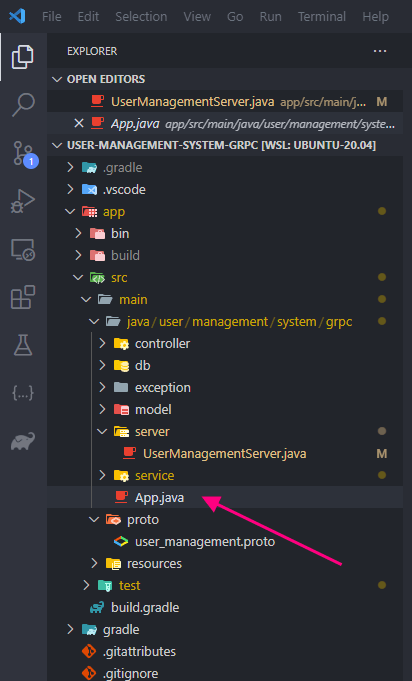
Once the server definitions are created then we need to build the actual server. You need to build the server inside the main method. In our case, the App.java is the file that contains the main method. It may be a different file in your case.
Let’s define the server
package user.management.system.grpc;

import java.io.IOException;

import io.grpc.Server;
import io.grpc.ServerBuilder;
import user.management.system.grpc.server.UserManagementServer;

public class App {

    public static void main(String[] args) throws IOException, InterruptedException {
         Server server = ServerBuilder.forPort(8181)
         .addService(new UserManagementServer())
         .build();
         server.start();
         server.awaitTermination();
    }

}- we are using the Server and ServerBuilder class from grpc-netty library to create the server
- The GRPC Server is listening on port 8181
- An Instance of UserManagementServer is created and supplied to the addService method of ServerBuilder
Run the Java GRPC server
Go to your command line and to the project root directory and then run the command
./gradlew run
This is the way to create the GRPC server
Previous: Part 2: MySQL Database | User Management Service | Java GRPC